Rails 5 API + devise でパスワードのリセット
Rails 5 API + devise でパスワードのリセット
前回: http://uraway.hatenablog.com/entry/2016/07/11/090206
Rails 5 API + devise の資料があんまりなかったのでメモ。前提として devise を使ったユーザー登録、ログイン機能を持っている API を作成しているとします。
また、 この一連のチュートリアルでは devise_token_auth は使用しません。
ソースコードは GitHub にあるので、gem のバージョンやフォルダ構成などの参考にしてください。
- rails (5.2.2)
- devise (4.5.0)
mailcatcher の導入
今回はメーラーを使用するので、mailcatcher を導入します。設定が楽なので Docker を使いますが必須ではないです。
# Dockerfile
FROM ruby:2.5

ENV APP_ROOT /usr/src/devise-api

RUN apt-get update -qq && apt-get install -y build-essential libpq-dev nodejs
# SQLite
RUN apt-get install sqlite3 libsqlite3-dev -y

RUN mkdir $APP_ROOT
WORKDIR $APP_ROOT
COPY Gemfile $APP_ROOT/Gemfile
COPY Gemfile.lock $APP_ROOT/Gemfile.lock
RUN bundle install
COPY . $APP_ROOT
# docker-compose.yml
version: "3"
services:
  app:
    build: ./
    command: bundle exec rails s -p 3000 -b '0.0.0.0'
    volumes:
      - .:/usr/src/devise-api
    ports:
      - "3000:3000"
    tty: true
    stdin_open: true
  mailcatcher:
    image: schickling/mailcatcher
    ports:
      - "1080:1080"
      - "1025:1025"
mailcatcher の設定を書き加えます。Docker を使用している場合はホスト名にコンテナ名を使用することができます。
# config/environments/development.rb
  config.action_mailer.smtp_settings = {
    address: 'mailcatcher',
    port: 1025
  }
docker-compose up して、http://localhost:1080 にアクセスしましょう。
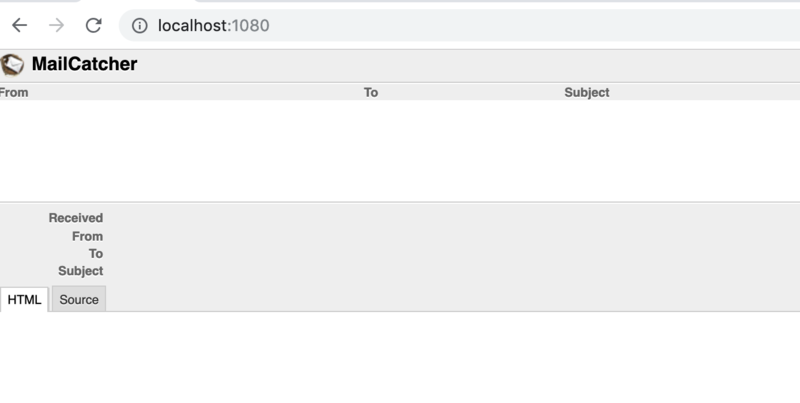
パスワードリセットメールを送信する
devise の recoverable をオンにします。
# app/models/user.rb

class User < ApplicationRecord
  devise :database_authenticatable, :registerable, :validatable, :recoverable
passwords_controller.rbを新たに作り、ルートを割り当てます。send_reset_password_instructions は devise が用意したメソッドで、ユーザーにパスワードリセットメールを送信します。
このとき注意したいのがレスポンスに関してで、リクエストパラメータのメールアドレスを持つユーザーが存在しないとき、その有無のエラーメッセージを返すのではなく、有無にかかわらず同じメッセージを返したほうが良いでしょう。悪意のある送信者に、そのメールアドレスのユーザーが登録されているかを知られることを防ぐことができます。
# app/controllers/passwords_controller.rb
module V1
  class PasswordsController < ApplicationController
    skip_before_action :authenticate_user_from_token!, only: [:create]

    def create
      user = User.find_by(email: create_params[:email])
      user&.send_reset_password_instructions
      render json: {}
    end

    private

    def create_params
      params.require(:user).permit(:email)
    end
  end
end
# config/routes.rb
    ...
    resource :passwords, only: [:create]
    ...
send_reset_password_instructionsで送信されるメールテンプレートは、app/views/devise/mailers/reset_password_instructions.html.erb にて次のように定義されています。
<p>Hello <%= @resource.email %>!</p>

<p>
  Someone has requested a link to change your password. You can do this through
  the link below.
</p>

<p>
  <%= link_to 'Change my password', edit_password_url(@resource,
  reset_password_token: @token) %>
</p>

<p>If you didn't request this, please ignore this email.</p>
<p>
  Your password won't change until you access the link above and create a new
  one.
</p>
edit_password_url を token 付きのフロントエンドのパスワードリセットページ URL に変えます。
<p>
  <%= link_to 'Change my password', "https://yourfrontend.com?token=#{@token}"%>
</p>
mailcatcher を使ってメールが送信されることを確かめてみましょう。メールアドレスが user@example.com のユーザーが存在するとします。
$ curl -X POST -H "Content-Type: application/json" localhost:3000/v1/passwords --data '{"user": { "email": "user@example.com" } }'

{}
http://localhost:1080 にアクセスして、メールの内容を確認してみます。
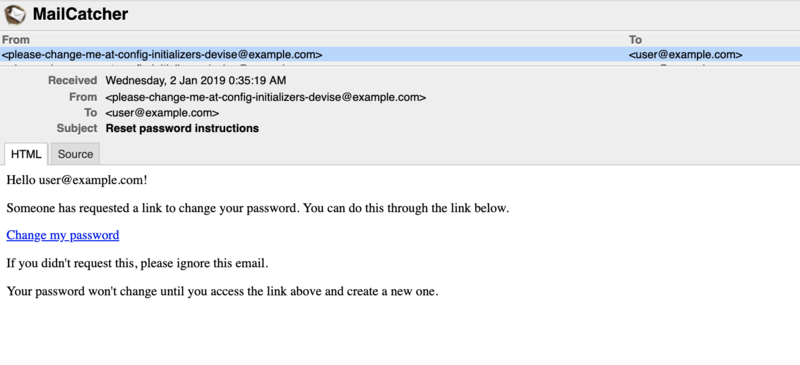
Change my password をクリックすると、次のようなリセットパスワードトークン付きの URL が取得できます: https://yourfrontend.com/?token=8XAXEzhFxCnn6zidyb9B
トークンを受け取ってパスワードリセットする
リセットパスワードトークンは暗号化されてデータベースに保存されるため、リセットパスワードトークンからユーザーを見つけ出し、パスワードをリセットするには、devise によって追加されたクラスメソッド User.reset_password_by_token を使用します。このメソッドは reset_password_token/password/password_confirmationを受け取ります。
リセットパスワードトークンと新しいパスワードを受け取り、パスワードを更新するコントローラーを定義しましょう。
# app/controllers/passwords_controller.rb
module V1
  class PasswordsController < ApplicationController
    skip_before_action :authenticate_user_from_token!, only: [:create, :update]

    ...

    def update
      user = User.reset_password_by_token(update_params)
      render json: user, status: :ok, serializer: V1::UserSerializer
    end

    private

    ...

    def update_params
      params.require(:user).permit(:password, :password_confirmation, :reset_password_token)
    end
  end
end
# config/routes.rb
    ...
    resource :passwords, only: [:create, :update]
    ...
パスワードのリセットを試してみましょう。先程送信したメールのクエリにあるトークンと、新しく設定したいパスワードをデータに PUT リクエストを実行します。
$ curl -X PUT -H "Content-Type: application/json" localhost:3000/v1/passwords --data '{"user": {"password": "newpass" ,"reset_password_token": "nysLs8eSLHHZm3eNw2fg"}}'

{"email":"user@example.com"}
パスワードが新しく設定できたかどうかも確認してみましょう。
$ curl -X POST -H "Content-Type: application/json" localhost:3000/v1/login --data '{"email": "user@example.com", "password": "newpass"}'

{"email":"user@example.com","token_type":"Bearer","user_id":1,"access_token":"1:yyjsJ_4oLN6k6z9_rZxE"}
rspec を書いてみよう
リセットパスワードトークンはその期限が config/initializers/devise.rb にて定義されており、任意に変更できます。
  # Time interval you can reset your password with a reset password key.
  # Don't put a too small interval or your users won't have the time to
  # change their passwords.
  config.reset_password_within = 6.hours
rspec を書いてみることで、トークンの期限が正しいかを確認しましょう。rspec 自体の導入方法については割愛します。
Gemfile に以下の 2 つの gem を追記して、bundle install します:
gem 'factory_bot_rails', '~> 4.0'
gem 'rspec-rails', '~> 3.8'
TimeHelpers#travel_to を使って、次のようにリセットパスワードトークンが正しく期限切れになるかどうか確認することができます。
# spec/requests/passwords_spec.rb
require 'rails_helper'

include ActiveSupport::Testing::TimeHelpers

  ...

  describe 'PUT /v1/passwords' do
    before do
      @raw, enc = Devise.token_generator.generate(User, :reset_password_token)
      user.reset_password_token   = enc
      user.reset_password_sent_at = Time.now.utc
      user.save(validate: false)
    end

    context 'when params have a new password and a valid token' do
      it 'resets password' do
        travel_to(Time.current + 5.hours)
        params = { user: { password: 'newpass', password_confirmation: 'newpass', reset_password_token: @raw } }
        put '/v1/passwords', params: params
        expect(User.first.valid_password? 'newpass').to eq true
      end
    end

    context 'when params have invalid token' do
      it 'does not reset password with expired token' do
        travel_to(Time.current + 7.hours)
        params = { user: { password: 'newpass', password_confirmation: 'newpass', reset_password_token: @raw } }
        put '/v1/passwords', params: params
        expect(User.first.valid_password? 'newpass').to eq false
      end
    end

    ...

  end
Docker で始める golang 入門
Docker で始める golang 入門
Docker 環境
動作確認済のバージョン:
- Version 2.0.0.0-mac81 (29211)
こちら http://studio-andy.hatenablog.com/entry/go-todo-crud がすごいわかりやすくて良いので、これに沿うような Docker 環境を整えてみる。
まずは何はともあれDockerfile
FROM golang:1.10.2

WORKDIR /go/src/go-todo/

RUN go get -u github.com/golang/dep/cmd/dep \
              bitbucket.org/liamstask/goose/cmd/goose
depはパッケージマネージャで、gooseはマイグレーションツール。
WORKDIRは/go/src以下でないとパスが通らなくなる。
次にdocker-compose.ymlを下記の内容で作成:
version: "3"
services:
    db:
        image: mysql:8
        volumes:
            - ./docker-runtime/mysql:/var/lib/mysql
        environment:
            MYSQL_ROOT_PASSWORD: password
            MYSQL_DATABASE: sampledb
            MYSQL_USER: sampleuser
            MYSQL_PASSWORD: password

    app:
        build: .
        volumes:
            - .:/go/src/go-todo/
        ports:
            - "8080:8080"
        tty: true
        stdin_open: true
        links:
            - db
ビルドしてバックグラウンド実行し、初期ロックファイルGopkg.lockを作成する:
$ docker-compose up -d --build
$ docker-compose exec app dep init
volumesしてあるので、ファイルがホストとも共有される。
Hello World
基本となるコントローラーファイルsrc/controller/index.goを作成:
package controller

import (
    "net/http"

    "github.com/gin-gonic/gin"
)

func IndexGET(c *gin.Context) {
    c.String(http.StatusOK, "Hello World")
}
上記のコントローラーをルートに割り振る。
main.go:
package main

import (
    "go-todo/src/controller"

    "github.com/gin-gonic/gin"
)

func main() {
    router := gin.Default()

    router.GET("/", controller.IndexGET)
    router.Run(":8080")
}
docker-compose.ymlのappにcommandを追加:
    app:
        command: go run main.go
        build: .
        volumes:
            - .:/go/src/go-todo/
        ports:
            - "8080:8080"
        tty: true
        stdin_open: true
        links:
            - db
これでdocker-compose up -dするとサーバーが立ち上がるので、http://localhost:8080 にアクセスできる :tada:
DBの用意
mysql のコンテナに入ってデータベースを作成:
docker-compose exec db mysql -uroot -ppassword
Enter password:

mysql> CREATE DATABASE sampledb;
データベース接続のための設定ファイル。ホスト名はdocker-compose.ymlで記述したdbになることに注意。
db/dbconf.yml:
development:
    driver: mymysql
    open: tcp:db:3306*sampledb/root/password
接続の確認:
$ docker-compose exec app goose status
goose: status for environment 'development'
    Applied At                  Migration
    =======================================
次のコマンドで、マイグレーションファイル(db/migrations/timestamp_createTask.sql)が作成されるので、SQL を追記。
$ docker-compose exec app goose create createTask sql
-- +goose Up
-- SQL in section 'Up' is executed when this migration is applied
CREATE TABLE IF NOT EXISTS task (
    id INT UNSIGNED NOT NULL,
    created_at TIMESTAMP(6) NOT NULL DEFAULT CURRENT_TIMESTAMP(6),
    updated_at TIMESTAMP(6) NOT NULL DEFAULT CURRENT_TIMESTAMP(6) ON UPDATE CURRENT_TIMESTAMP(6),
    title VARCHAR(255) NOT NULL,
    PRIMARY KEY(id)
);


-- +goose Down
-- SQL section 'Down' is executed when this migration is rolled back
DROP TABLE task;
マイグレーションを実行:
$ docker-compose exec app bash goose up
モデルの接続
$ docker-compose exec app bash
/go/src/go-todo # go get -u golang.org/x/tools/cmd/goimports
/go/src/go-todo # go get -u github.com/xo/xo
xo ドライバ://ユーザー:パスワード@ホスト/データベースコマンドで各 model ファイルを作成:
/go/src/go-todo # mkdir -p models
/go/src/go-todo # xo mysql://root:password@db/sampledb -o models
models/model.goファイルを作成し、接続情報を記述する:
package models

import (
    "database/sql"
    "log"

    // mysql driver
    _ "github.com/go-sql-driver/mysql"
)

// DBConnect returns *sql.DB
func DBConnect() (db *sql.DB) {
    dbconf := "root:password@tcp(db:3306)/sampledb"
    db, err := sql.Open("mysql", dbconf)
    if err != nil {
        log.Fatal(err)
    }
    return db
}
あとは同じなので省略!
VSCode からはてなブログに投稿できる拡張作りました
VSCodeからはてなブログに投稿できる拡張作りました
作りました
気に入ったらスターください
前に作ったAtom版はこっち
下準備
使用には以下の3つが必要です

Blog IDとAPI Keyははてなブログ詳細設定のページから確認できます。Blog IDはルートエンドポイントに次のように埋め込まれてます。API Keyは公開しないでくださいね
https://blog.hatena.ne.jp/{はてなID}/{ブログID}/atom
プラグインダウンロード後に、Code > Preferences > Settings からこれらを設定します。

エントリの投稿
コマンドパレットからHatenablogger: Post or Updateを選択するとプロンプトが出てくるので、タイトル、カテゴリー(カンマ区切り)、 公開するかどうか(yesなら公開)を入力すればエントリが投稿され、元のファイルにコンテキストコメントが挿入されます。

エントリの更新
同じく、コマンドパレットからHatenablogger: Post or Updateを選択します。コンテキストコメントの有無で投稿か更新かを判別しています。ただしAPIの仕様なのか、一度公開したエントリを下書きに戻すことはできないみたいです。

イメージのアップロード
コマンドパレットからHatenablogger: Upload Imageを選択して、はてなフォトライフに画像をアップロード、カーソル位置に画像リンクを挿入します。

とりあえず今の段階では3つの機能だけ。予約投稿したい場合は、残念ながらそのためのAPIは用意されていないので、はてなブログ上から設定するしかありません。
VSCodeならtextlintも使えるのでかなり快適な執筆環境が構築できます。
S3 + CloudFront の CORS 設定
手順をメモっとく
S3 の設定
[Permissions] > [CORS configuration] から以下のように設定を追加:
<CORSConfiguration>
<CORSRule>
    <AllowedOrigin>*</AllowedOrigin>
    <AllowedMethod>GET</AllowedMethod>
</CORSRule>
</CORSConfiguration>
CloudFront の設定
[Behavior] > [Cache Based on Selected Request Headers] から Origin ヘッダだけをS3に通す設定を行う:

で、最後に curl で確認して、access-control-allow-origin: * が返ってきていればよし
$ curl -X GET -I -H "Origin: https://example.com" https://example.cloundfront.net/path/to/image.png
HTTP/2 200
content-type: image/png
content-length: 43881
date: Wed, 28 Nov 2018 14:24:17 GMT
access-control-allow-origin: *
access-control-allow-methods: GET
last-modified: Mon, 30 Oct 2017 07:22:28 GMT
etag: ""
accept-ranges: bytes
server: AmazonS3
vary: Origin
x-cache: Miss from cloudfront
PWAでオフラインでも使える辞書アプリ作ってみた
いつも英語学習にはアルクの英辞郎の辞書アプリ使ってたんだけど、フィリピンのネットスピードでは使いづらいものがあって、オフラインでも使える辞書アプリ探すかなーと思っていたところ
Chrome拡張の高速な英語辞書ツールをつくりました(Mouse Dictionary) - Qiita
という記事の中で、英辞郎の辞書データを購入できることを知ったので、どうせならとPWAで辞書アプリを自作してみた。
https://uraway.github.io/dictionary-app/
Chrome CanaryとiPhoneのSafariでオフライン動作することを確認している

ソースコード
もちろんCRA製
GitHub - uraway/dictionary-app
lighthouseはこんな感じ。フィリピンというかセブではそもそも4Gですらないが…

storybookで@babel7を使う
参考:
環境:
"@babel/core": "^7.1.2",
"@storybook/react": "^3.4.11",
"babel-loader": "^8.0.4",
storybookで@babel7を使うために、storybookのwebpack設定を少し上書きする。
.babelrc.js (@babel7に対応したBabel設定ファイル)
module.exports = {
  presets: ["@babel/preset-env", "@babel/preset-react", "@babel/preset-flow"],
  plugins: ["@babel/plugin-proposal-class-properties"]
}
.storybook/webpack.config.js
const babelConfig = require("../.babelrc")

module.exports = (baseConfig, env, defaultConfig) => {
  defaultConfig.module.rules[0].loader = require.resolve('babel-loader');

  defaultConfig.module.rules[0].query.presets = babelConfig.presets;
  defaultConfig.module.rules[0].query.plugins = babelConfig.plugins;

  return defaultConfig;
};
はてなブログのシンタックスハイライトを jsx に対応させる
やたら重いので消した (2018/10/18)
はてなブログのシンタックスハイライトを jsx に対応させる
はてなブログのシンタックスハイライトは、2018/08 現在jsxには対応していない。
http://help.hatenablog.com/entry/markup/syntaxhighlight
なので、PrismJSを使って対応させてみる。
PrismJS を読み込む
<head>内に以下を追加。好みのテーマとライブラリを読み込む。CDN で読み込む場合は、ハイライトしたい言語の依存関係にあるものをすべて含める必要がある。依存関係はこちらで確認できる。jsxをハイライトしたいならば、javascriptとmarkup、そしてjsxが必要なので、そのとおりに読み込む。
->|html|
    <script type="text/javascript">
        document.addEventListener('DOMContentLoaded', () => {
            const cssSources = [
                "npm/prismjs@1.15.0/themes/prism-dark.min.css"
            ];
            const link = document.createElement('link');
            link.rel = "stylesheet";
            link.href = `https://cdn.jsdelivr.net/combine/${cssSources.join(',')}`;
            document.head.appendChild(link);

            const jsSources = [
                "npm/prismjs@1.15.0",
                "npm/prismjs@1.15.0/components/prism-javascript.min.js",
                "npm/prismjs@1.15.0/components/prism-jsx.min.js",
                "npm/prismjs@1.15.0/components/prism-markup.min.js"
            ];
        });
    </script>
PrismJS では、パースされたトークン(構文の最小構成単位)にkeywordクラスが与えられることがあるが、はてなブログのデフォルトの CSS が!importantでそれに対して適用されてしまうので、打ち消す必要がある:
->|html|
    <style>
        .token.atrule,
        .token.attr-value,
        .token.keyword {
            color: #d1939e !important; /* テーマによって値は異なる */
        }
    </style>
ハイライトさせる
PrismJS は、次のようなcodeブロックの中身をすべてパースし、クラス名に沿ってハイライトしてくれる。
->|html|
<pre><code class="language-css">p { color: red }</code></pre>
が、マークダウン記法に慣れているといちいちタグで囲むのも、クラス名を割り当てるのも少々めんどくさいので、次のスクリプトを追加する。ついでに<と>もエスケープする:
->|js|
document.addEventListener('DOMContentLoaded', () => {
/* 略 */
var pres = document.querySelectorAll('pre');
pres.forEach((pre) => {
const langRegExp = /^->\|(.*)\|\n/
const lang = pre.innerHTML.match(langRegExp);
if (!lang) return;
const content = pre.innerHTML
.replace(langRegExp, '')
.replace(/</g, '<')
.replace(/>/g, '>')
pre.innerHTML = `<code class="language-${lang[1]}">${content}</code>`;
pre.setAttribute('class', `language-${lang[1]}`);
});
});
これによって、次のようにブロックのはじめに->|jsx|を書くと:
->|none|
->|jsx|
class Todo component Component {
  render () {
    return <div />
  }
}
PrismJS がパース可能な HTML が作り出されるようになる:
->|none|
<pre class="language-jsx">
  <code class="language-jsx">
    class Todo component Component {
      render () {
         return <div />
      }
    }
  </code>
</pre>
プラグイン
PrismJS には、プラグインがいくつか用意されており、拡張が可能。ただ、CSS がはてなのデフォルト CSS とバッティングする可能性があるので慎重に。
Line Numbers
行番号を追加するプラグインを入れてみる。 まずは、プラグイン用のスクリプトと、CSS を追加する:
->|js|
        document.addEventListener('DOMContentLoaded', () => {
            const cssSources = [
                                 /* 略 */
                "npm/prismjs@1.15.0/plugins/line-numbers/prism-line-numbers.min.css"
            ];
            const link = document.createElement('link');
            link.rel = "stylesheet";
            link.href = `https://cdn.jsdelivr.net/combine/${cssSources.join(',')}`;
            document.head.appendChild(link);

            const jsSources = [
                                 /* 略 */
                "npm/prismjs@1.15.0/plugins/line-numbers/prism-line-numbers.min.js",
            ];
            const script = document.createElement('script');
            script.src = `https://cdn.jsdelivr.net/combine/${jsSources.join(',')}`
            document.body.appendChild(script);

            /* 略 */
        });
preタグのクラスにline-numbersを加える:
->|js|
        document.addEventListener('DOMContentLoaded', () => {
            /* 略 */
            pres.forEach((pre) => {
                /* 略 */
                pre.setAttribute('class', `line-numbers language-${lang[1]}`);
            });
        });
これだけだと、プラグインが追加した行番号のフォントサイズとはてなのデフォルトのフォントサイズが違うためか、ずれてしまうことがあるので、行番号の方を修正する:
->|html|
<style>
/* 略 */
code[class*=language-], pre[class*=language-] {
  font-size: inherit;
}
</style>
Copy to Clipboard
ツールバーにコピーボタンを加える。 まずは同じように、JS と CSS ファイルを読み込む:
->|js|
        document.addEventListener('DOMContentLoaded', () => {
            const cssSources = [
                /* 略 */
                "npm/prismjs@1.15.0/plugins/toolbar/prism-toolbar.min.css"
            ];
            const link = document.createElement('link');
            link.rel = "stylesheet";
            link.href = `https://cdn.jsdelivr.net/combine/${cssSources.join(',')}`;
            document.head.appendChild(link);

            const jsSources = [
                /* 略 */
                "npm/prismjs@1.15.0/plugins/toolbar/prism-toolbar.min.js",
                "npm/prismjs@1.15.0/plugins/copy-to-clipboard/prism-copy-to-clipboard.min.js"
            ];
            const script = document.createElement('script');
            script.src = `https://cdn.jsdelivr.net/combine/${jsSources.join(',')}`
            document.body.appendChild(script);

            /* 略 */
        });
これで、ツールバーにコピーボタンが追加される。
しかし、デザインが好みじゃないので、カスタマイズしてみる。PrismJS の読み込み後に ClipboardJS を読み込み、そのコールバック内でコピーボタンを追加:
->|js|
        document.addEventListener('DOMContentLoaded', () => {
            /* 略 */
            const jsSources = [
                /* 略 */
                "npm/prismjs@1.15.0/plugins/toolbar/prism-toolbar.min.js"
            ];
            const script = document.createElement('script');
            script.src = `https://cdn.jsdelivr.net/combine/${jsSources.join(',')}`
            script.onload = () => {
                const clipboardJSSrc = document.createElement("script");
                clipboardJSSrc.src = "https://cdnjs.cloudflare.com/ajax/libs/clipboard.js/2.0.0/clipboard.min.js";
                clipboardJSSrc.onload = () => {
                    addCopyBotton()
                }
                document.querySelector("head").appendChild(clipboardJSSrc);
            }
            document.head.appendChild(script);
            /* 略 */
        })

        function addCopyBotton() {
            Prism.plugins.toolbar.registerButton('hello-world', (env) => {
                var linkCopy = document.createElement('a');
                linkCopy.innerHTML = '<i class="copy-icon material-icons">file_copy</i>'
                registerClipboard();
                return linkCopy;

                function registerClipboard() {
                    var clip = new ClipboardJS(linkCopy, {
                        'text': function () {
                            return env.code;
                        }
                    });
                }
            });
        }
linkCopyのアイコンはお好みのものをどうぞ。
正直カスタマイズがかなりめんどくさかったので、次なんかやるとしたらブログ移行してからかな…